Install Intellij IDEA on Ubuntu Desktop
IntelliJ Is one of the most popular JAVA IDE. If you are a Java developer who used Ubuntu Desktop, you probably need to install IntelliJ IDE on Ubuntu.
IntelliJ IDEA is available as a free Community Edition as well as commercial edition. One we are going to install on Ubuntu is the Community Edition, but the installation process is same for the Both editions.
This guide is compatible with both Ubuntu 18.04 and 16.04 to install intellij IDEA.
Following are the steps needed to be done in order to install intellij Ubuntu 18.04.
- Install Java Development Kit.
- Download IntelliJ IDEA for Ubuntu.
- Unpack the IntelliJ Linux .tar.gz file.
- Run idea.sh from the bin subdirectory.
Install the Java Development Kit if you haven't installed already.
sudo apt-get install openjdk-8-jdk-headlessTo download IntelliJ IDEA for Ubuntu, Go to jetbrains.com and download IntelliJ IDEA for Linux. The package is tar.gz file.

After the Download is finished, Extract the tar file to /opt directory.
sudo tar -zxvf ideaIC-2017.2.5.tar.gz -C /optInside the bin subdirectory of the extracted folder, run the idea.sh script to start Initial configuration of the IntelliJ IDE.
cd /opt/
cd idea-IC-172.4343.14/bin/
./idea.sh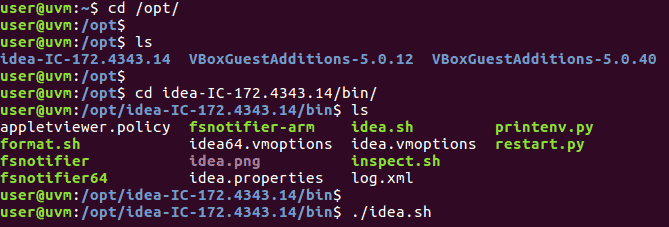
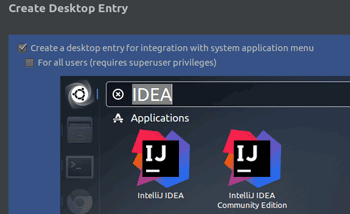
During the first startup, IntelliJ IDEA will ask you which plugins should be enabled by default. And Make sure that you create a desktop entry for the Ubuntu IntelliJ IDEA.
You can continue the rest of the process with default options to install IntelliJ on Ubuntu 18.04.