How to Install Visual Studio Code on Ubuntu 24.04 LTS Linux (VS Code)
In this guide, I will show you how to get the latest version of Visual Studio Code for Ubuntu. I will be installing it on Ubuntu 24, but this will work on any version of Ubuntu Desktop.
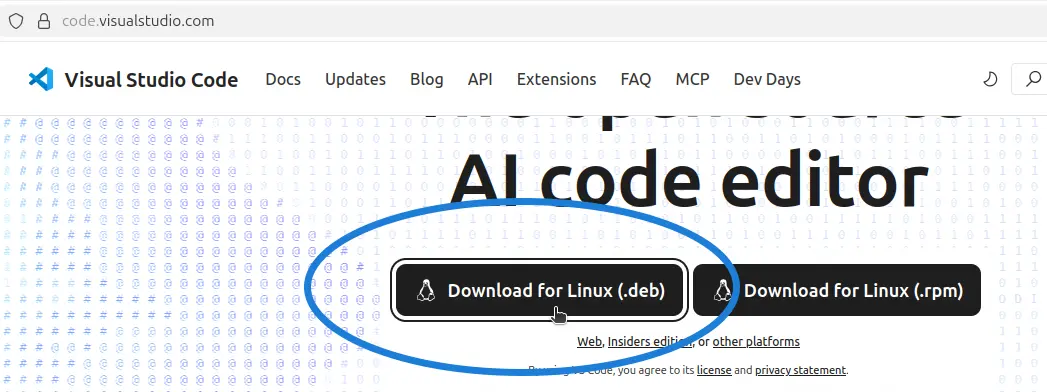
Step 1: Download Visual Studio Code for Ubuntu
First, you need to download the VS Code Linux .deb package. Go to the official website at code.visualstudio.com to download it.
Step 2: Install Visual Studio Code
Once the download is finished, open your terminal and move into the folder where you saved the .deb package. Then, install it using the apt install command.
The command will look like this:
sudo apt install ./filename.debWhen you specify the package name, put ./ before the filename like shown above. That’s how we install .deb packages using the apt install command.

And that’s it — you now have Visual Studio Code on Ubuntu.
How to Update VS Code
There are two main methods to update VS Code on Ubuntu.
Method 1: Using Terminal
Run the following command:
sudo apt install --only-upgrade codeHere, code is the package name that provides VS Code to Ubuntu. If there’s any update available, it will be installed.
Method 2: Re-download the Package
Another way to update is to repeat the same process you used for the initial installation. Download the latest version from the Visual Studio website and install it using the apt install command. This will also upgrade VS Code to the latest version.
That’s it! You now know how to install and update Visual Studio Code on Linux Ubuntu 24.04.