How to Create, Apply, and Delete Checkpoints in Hyper-V
Hyper-V checkpoints let you save the state of a virtual machine and go back to it later — a simple way to undo changes, test updates safely, or recover from a mistake. In this guide, we'll show you how to create, apply, and delete checkpoints in Hyper-V, step by step.
What Are Hyper-V Checkpoints?
If you've used VMware Workstation Pro or VirtualBox before, you already know this feature — it's just called something different there. In VMware and VirtualBox, it's called a snapshot. In Hyper-V, it's called a checkpoint. Same feature, different name.
A checkpoint saves the current state of your virtual machine, so if something goes wrong later — a bad update, a config mistake, or anything else — you can revert back to that saved point instead of rebuilding the VM from scratch.
One thing worth knowing: you can create a checkpoint whether the virtual machine is turned on or turned off. In this guide, we'll create a checkpoint on a Windows 11 VM while it's running.
Step 1: Open the Checkpoints Section in Hyper-V Manager
- Open Hyper-V Manager.
- Select the virtual machine you want to work with.
- In the middle pane, you'll see a section called Checkpoints.
Every checkpoint you create for that VM will show up in this section. If it's your first time creating one, this area will be empty.
Step 2: Create a Checkpoint
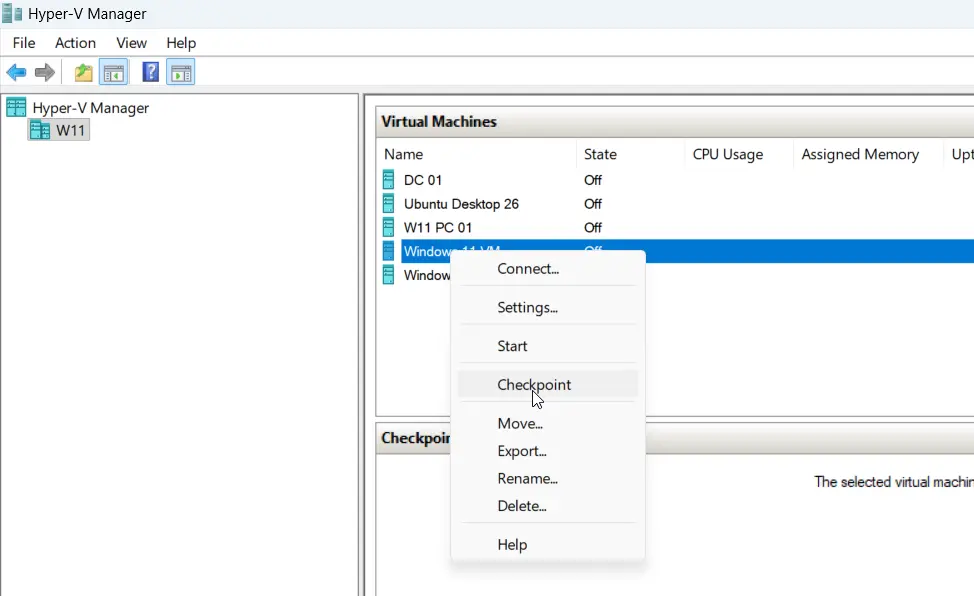
- Right-click the virtual machine.
- Click Checkpoint.
Hyper-V will create the checkpoint and name it automatically — the VM's name followed by the date and time. There's no prompt to name it yourself at creation time, but you can easily rename it afterward.
To rename a checkpoint:
- Right-click the checkpoint in the Checkpoints pane.
- Click Rename.
- Give it a clear, recognizable name — for example, "Checkpoint 1."
Naming your checkpoints properly matters more than it seems. If you end up with several checkpoints over time, a clear name saves you from guessing which one is which.
Apply a Checkpoint (Revert Changes)
This is where checkpoints prove useful. Let's say you make a change to the VM — like deleting a shortcut from the desktop — and want to undo it.
To revert back to a previous checkpoint:
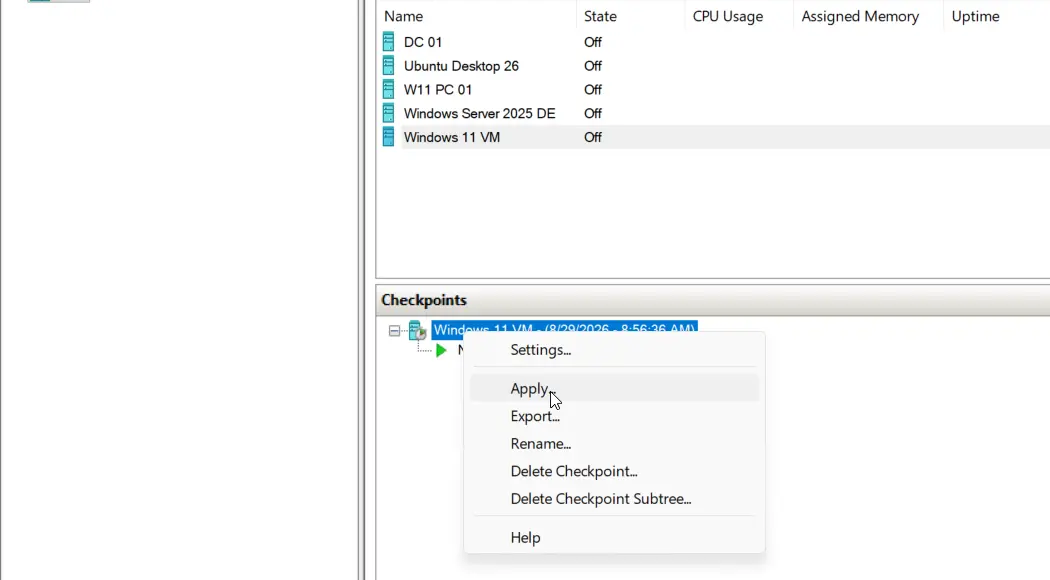
- Right-click the checkpoint you want to restore.
- Click Apply.
You'll be given two options:
- Create Checkpoint and Apply — This creates a new checkpoint of the VM's current state first, then reverts to the checkpoint you selected. Use this if you might want to come back to the current state later.
- Apply — This reverts straight to the selected checkpoint, and the VM's current state is lost.
If you don't need to save the current state, just select Apply. Once the process finishes and you go back into the virtual machine, everything will be restored to how it was at that checkpoint — including that shortcut you deleted.
Step 4: Delete a Checkpoint
Once you no longer need a checkpoint, you can remove it to free up space and keep things tidy.
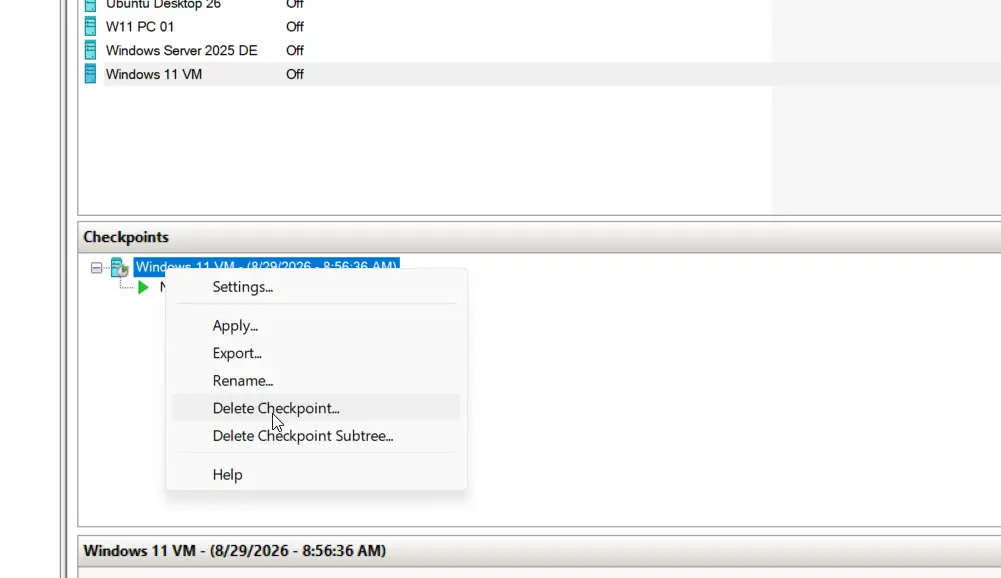
- Right-click the checkpoint.
- Choose one of two options:
- Delete Checkpoint — Deletes only the selected checkpoint.
- Delete Checkpoint Subtree — Deletes the selected checkpoint and every checkpoint that came after it.
Keep in mind that deleting a checkpoint isn't instant. Here's why: when Hyper-V creates a checkpoint, it creates a separate virtual hard drive to store the changes made after that point. When you delete the checkpoint, Hyper-V has to merge that data back into the VM's main virtual hard drive — and depending on the size of the checkpoint, this can take some time.
Important: Don't close Hyper-V Manager while a checkpoint is being deleted. Let the merge process finish on its own.
Final Thoughts
That's the full process for creating, applying, and deleting checkpoints in Hyper-V. They're a great safety net for testing changes, applying updates, or experimenting with a VM without the risk of permanently breaking something.
In the next guide, we'll cover how to clone a virtual machine in Hyper-V.