How to Update WordPress Automatically (WordPress Core, Themes and Plugins)
WordPress is the most popular content management system, used by more than 60 million websites on the internet. Because of its popularity, WordPress is a very attractive target for the hackers.
WordPress has bugs and security holes just like any other content management system. When developers find those issues, they release updates to the WordPress core, themes and plugins. And it is your responsibility to apply those updates regularly to keep your website/blog secure and up to date.
In this tutorial I will explain how to update WordPress to the latest version, regardless of the hosting platform that your website is running, e.g. cPanel or server running on Ubuntu, CentOS or FreeBSD.
Fortunately, It is quiet easy to update WordPress, But before we do that, backup your files and database.
Backup your Website and Database
First of all you should backup your files and database. This is really, really important. Almost all the time WordPress update goes very smoothly, But don't take anything for granted, If something went wrong, you need a backup to restore your website to previous state.
Create File Backup
From the Linux command line you can create a tar archive of your DocumentRoot to create a file backup.
tar -zcvf file_backup.tar.gz /var/www/html(Replace the /var/www/html with the actual document root of your website.)
You can also backup your files through FTP using an FTP client.
Create MySQL database Backup
In order to backup WordPress database, we can use either mysqldump command from the Linux command line or phpMyAdmin web interface.
To backup MySQL database with mysqldump, type:
mysqldump -u user_name -p database_name > database_name.sqlTo backup using phpMyAdmin, Log into phpMyAdmin, Choose your database > Click the Export button and click Go.
Note that, cPanel users can backup both files and database from the cPanel.
Update WordPress Core
If you have hosted your website on a cPanel Server, Then you can update WordPress without any further configuration.
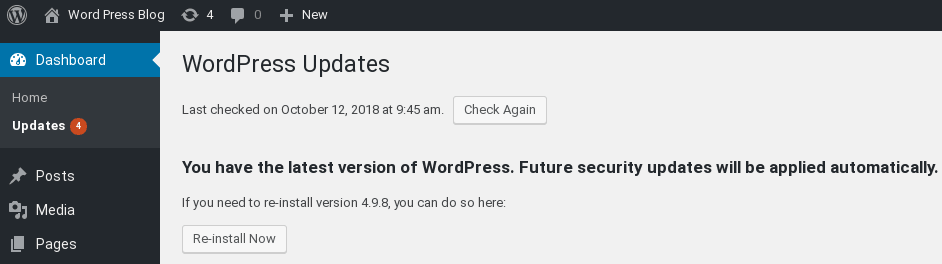
Log into the WordPress admin panel, Go to Updates and click Update Now.
If you have hosted your website on a non cPanel server, for example VPS or dedicated server, Then you need to do few additional configurations as described in below steps.
- Add FS_METHOD to wp-config.php.
- Set file permissions and group ownership.
- Update WordPress from the Admin dashboard.
- Correct File permissions.
First of all we need to add FS_METHOD constant to the WordPress main configuration file. Open the wp-config.php file and add the following line:
define( 'FS_METHOD', 'direct' );Next, we need to set the group owner of the Document Root as well as Read, write and execute permission for the group.
The group owner of the Document Root must be the apache user group of your web server. Name of the apache user group depends on the distribution you use. On Debian and Ubuntu it is www-data group, In Redhat, CentOS and Fedora group name is apache. In the FreeBSD name of the apache group is www.
On Debian and Ubuntu, Run:
chgrp -R www-data /var/www/htmlOn Red Hat, CentOS and Fedora, Run:
chgrp -R apache /var/www/htmlIf you are using FreeBSD, Run:
chgrp -R www wordpressNext we need to give Read, Write and execute permission to the group owner. We can do this using the chmod command:
chmod -R 775 wordpressNow we are ready to run the automatic update from the WordPress Dashboard. Log into the admin panel, Go to Updates and click Update Now.

Once the update process is finished, Go back to the update page and you should see the message: "You have the latest version of WordPress".
You can use the very same method to update WordPress theme and plugins.
Fix File permissions
To update WordPress we gave Read, write and execute permission to the group owner. We should roll back those changes keep our website secure.
Change the group ownership to root:
chgrp -R root /var/www/htmlThen, run the following two commands to set the directory permission mode to 755 and file permission mode to 644.
sudo find /var/www/html -type d -exec chmod 755 {} +
sudo find /var/www/html -type f -exec chmod 644 {} +
Troubleshooting Automatic Updates
One common problem is, you will be asked for the FTP credentials when you click the update button from the admin panel. This because FS_METHOD constant missing in your wp-config.php.
To correct the problem, make sure that you have following line in your wp-config.php file.
define( 'FS_METHOD', 'direct' );Unable to locate WordPress Root directory
Following are some common issues: "Could not create directory. Installation Failed", Unable to locate WordPress Root directory.
All these errors are due to bad file permissions. As we mentioned above, apache group should be the group owner of the document root and group should have read, write and execute permission to the document root.
If you have configured file access control list, group permissions may not work for you. In that case you have to make apache group the owner of the DocumentRoot.
chown -R www-data /var/www/html
chmod -R 755 /var/www/html
After the upgrade, roll back the ownership.
chown -R root-data /var/www/htmlSummary
The WordPress team regularly releases updates to the WordPress core. These updates include bug fixes and security patches. By updating WordPress, You also get access to new features, better admin interface and new improvements will make your website faster.
When new updates are available, notification will appear in the admin panel as shown in the following screenshot:

Not only WordPress core, you should also update your theme and most importantly plugins.