How to Create a Windows 11 Virtual Machine in Hyper-V
This is a follow-up to our previous guide on enabling Hyper-V and creating an Ubuntu Desktop VM. This time, we're creating a Windows 11 virtual machine — Windows running inside Windows.
If you haven't enabled Hyper-V yet, check that guide first before continuing here.
What You'll Need
- A Windows 11 ISO image (download the 64-bit version directly from Microsoft's official website — make sure you grab the ISO, not the installer)
- Hyper-V enabled on your Windows 11 host
- An external virtual switch (see our previous guide if you haven't set one up)
Step 1: Create the Virtual Machine
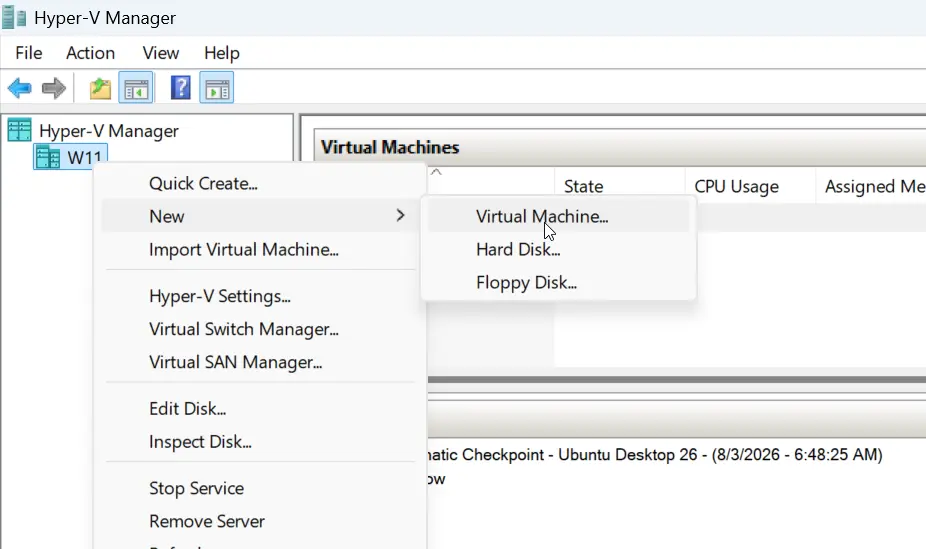
- Open Hyper-V Manager, right-click your host, and go to New > Virtual Machine.
- Give it a name — we're calling ours "Windows 11 VM."
- For Generation, select Generation 2. This is required for Secure Boot and virtual TPM, both of which Windows 11 needs.
- Assign RAM. We're using 6GB with Dynamic Memory enabled, so the VM only uses what it actually needs instead of locking all of that RAM at once, up to the maximum you set.
- Select your virtual switch to connect the VM to your network. We're using the external switch created in the previous video.
- Create a virtual hard drive. We went with 64GB — virtual hard drives are dynamic by default, so Hyper-V grows the disk as you add data to it, rather than using the full size right away.
- On the last step, choose Install an operating system later, then click Finish. We'll attach the ISO manually in the next step.
Step 2: Configure Settings Before Installing
Right-click the new VM and go to Settings.
- Go to Security, and enable the Trusted Platform Module.
- Go to SCSI Controller, select DVD Drive, and click Add. Choose Image File, then browse to your Windows 11 ISO.
- Go to Firmware, and move the DVD Drive to the top of the boot order, with the hard drive second.
Step 3: Install Windows 11
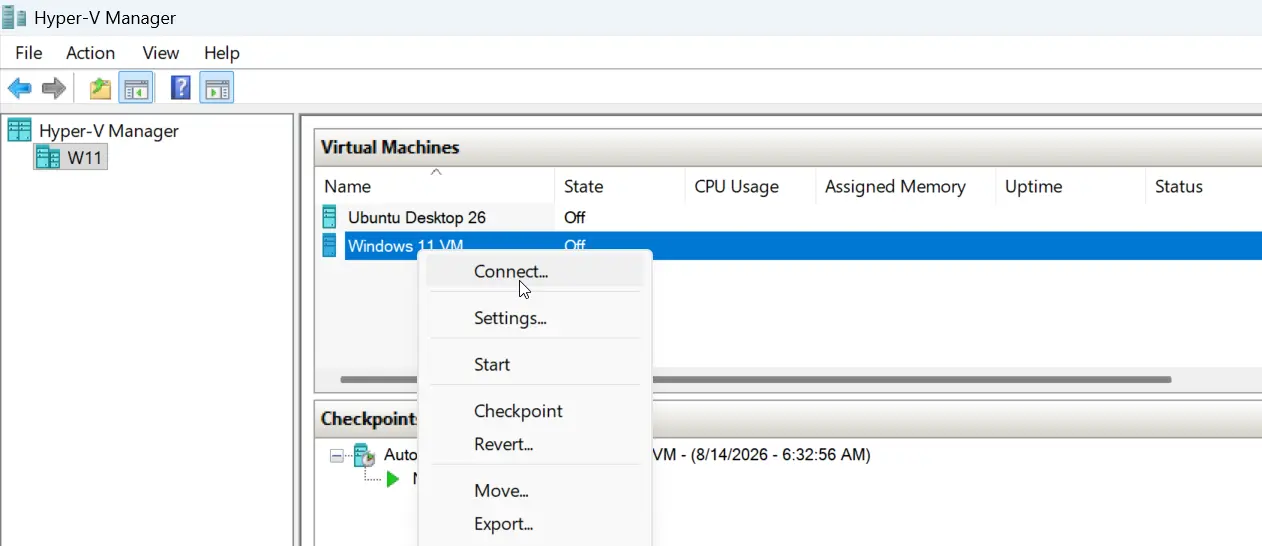
- Right-click the VM and select Connect, then click Start.
- When prompted to "press any key to boot from DVD," do it quickly. If you miss it, go to Action > Reset to try again.
- From here, Windows Setup runs just like it would on a physical PC.
A Login Screen Issue (and the Fix)
After installation, you might hit a frozen login screen. This happens because Windows Hello PIN doesn't work with Hyper-V's Enhanced Session Mode — and Enhanced Session Mode is what enables shared clipboard between your host and the VM.
To fix it:
- Disable Enhanced Session Mode to get past the login screen (View > Enhanced Session).
- Go to Windows Settings > Accounts > Sign-in options > Additional settings.
- Disable the option "For improved security, only allow Windows Hello sign-in for Microsoft accounts."
- Re-enable Enhanced Session Mode. The login screen will now ask for your password instead of the Hello PIN.
And that's it — you've got a working Windows 11 VM running on Hyper-V, with clipboard sharing working between host and guest.