Install Samba on Ubuntu, Transfer File From Windows to Linux
In this tutorial, you will learn how to install Samba on Ubuntu. Samba is open-source software that allows you to configure your Ubuntu Server as a file server to share files with Microsoft Windows via SMB Protocol.
After completing this tutorial, you should be able to configure an Ubuntu Server/Desktop as a file server to transfer files from Windows to Linux.
Setting Up a Samba Server
We can install Samba on Ubuntu 20.04 using the apt-get install command. First, update the apt source list, then install the samba package.
sudo apt update
sudo apt-get install samba
Starting, Stopping, and Restarting Samba
Samba server should start automatically after the installation has finished. To check samba status, we can execute the following command:
sudo systemctl status smbd.serviceYou can stop, start and restart Samba on Ubuntu with the systemctl command:
sudo systemctl stop smbd
sudo systemctl start smbd
sudo systemctl restart smbd
You can also run the ss command to make sure that the Ubuntu Samba Server is listening on ports 139 and 445.
sudo ss -tlnp | grep smbd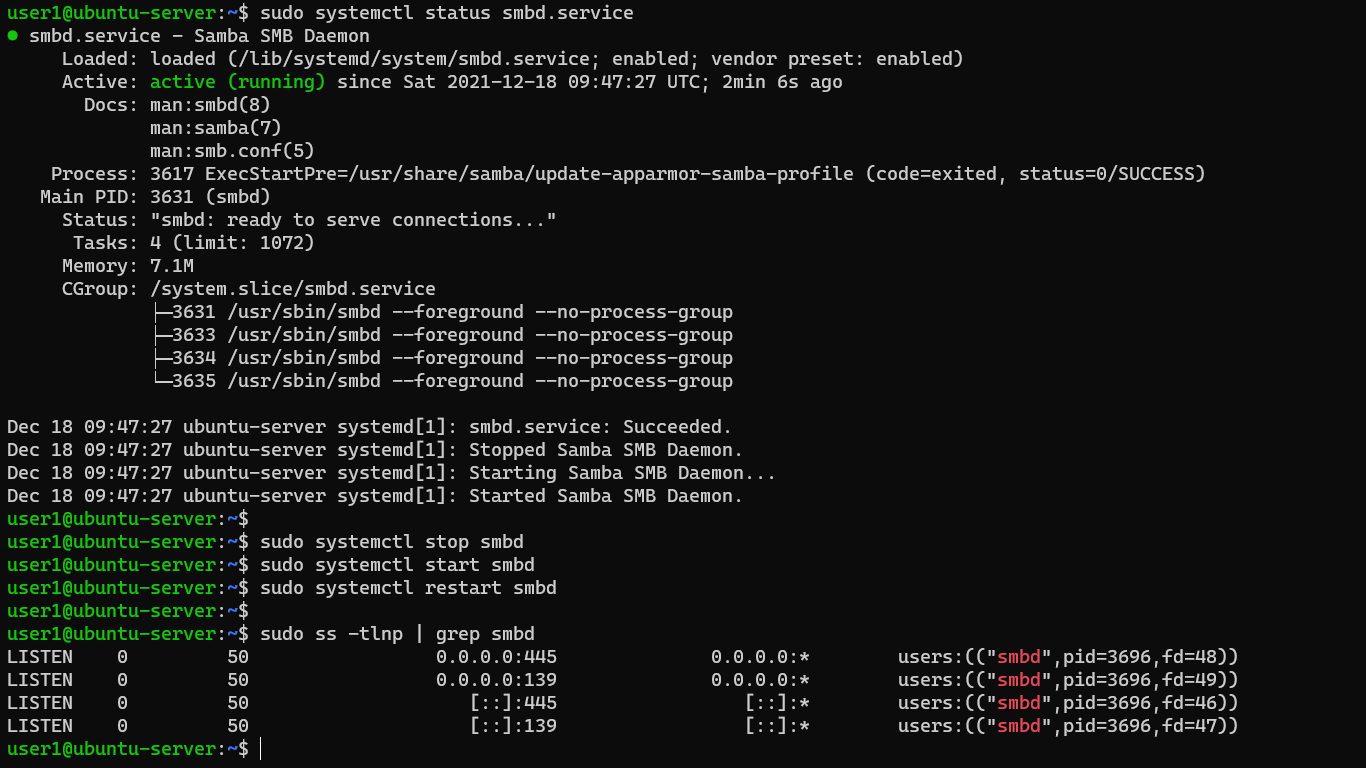
Samba Configuration File
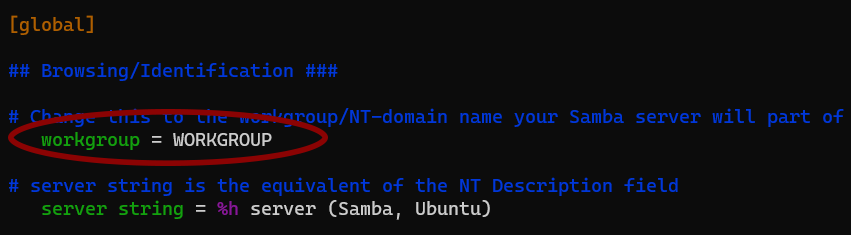
The main configuration file of the Samba Server is /etc/samba/smb.conf.

One important parameter of the main configuration file is the workgroup. The name of the workgroup should be the workgroup used in your Windows computer (most of the time, it is workgroup = WORKGROUP).
Create a Samba User and a Password
We need a username and a password to access a Samba share from a remote computer. We will create a new user called smbuser to access our Samba share from Windows 10/11.
sudo adduser smbuserAfter creating the user, set up the samba password for the user using the smbpasswd command (we can't use the standard Linux password to access a Samba share).
sudo smbpasswd -a smbuserConfiguring a Basic Samba Share
Now let's see how to share files on our Ubuntu Server with Windows using the Samba Server.
In this example, I'm gonna create a new folder called winshare inside the /var directory. You can use any existing folder if you want.
First, create the winshare directory using the mkdir command:
sudo mkdir /var/winshareAfter that, set the file permission and make smbuser the owner of the /var/winshare directory using the chown command:
sudo chmod 755 /var/winshare/
sudo chown smbuser /var/winshare
Then add the following configuration block to the /etc/samba/smb.conf file:
[winshare]
path=/var/winshare
browseable = yes
read only = no
valid user=smbuser
Save the smb.conf and reload the Samba Server with the systemctl command:
sudo systemctl reload smbd.serviceAccessing the Samba Share From Windows
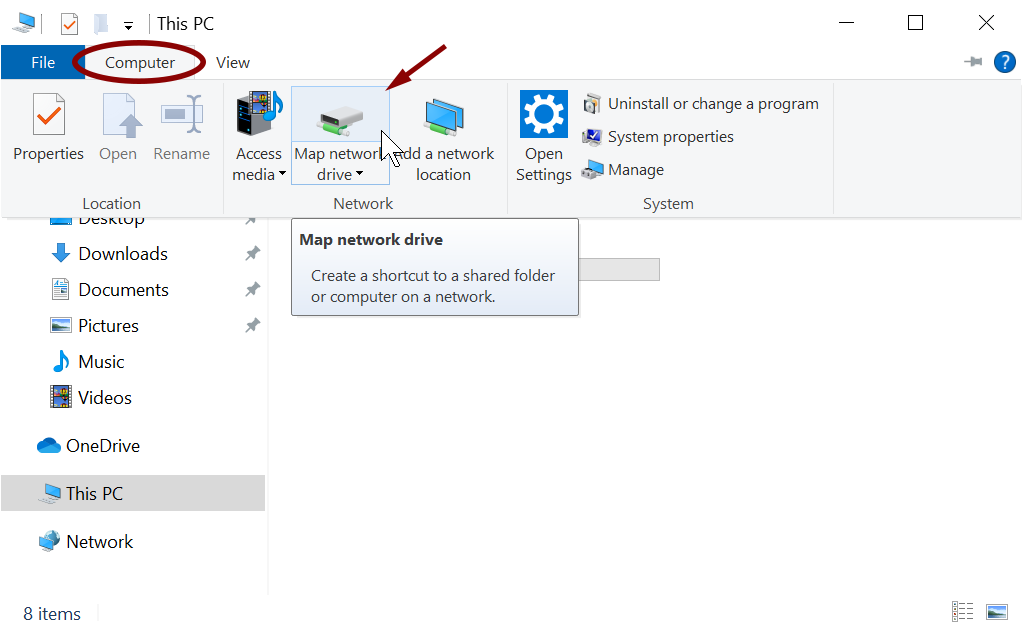
To mount the Samba share on Windows 10, go to My Computer (This PC) and click on the Computer tab, then Map network drive.
Then, select a Drive letter and type \\linux-server-ip\share-name in the folder path. For example, if the server IP is 192.168.1.10 and the share name is winshare, you will type \\192.168.1.10\winshare.
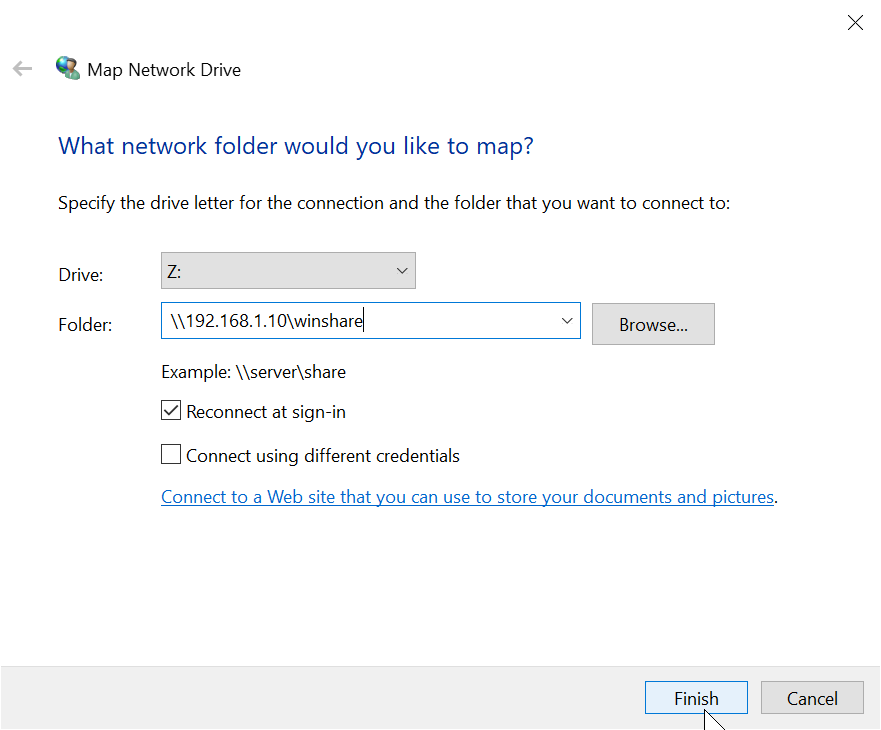
You will be prompted for the username and password. Use the Samba user and password we created and click ok to mount the Samba share.
Conclusion
So that is how we set up a basic samba share on Ubuntu Linux. You can refer to the man page of the smb.conf file for more advanced samba configuration options.
man 5 smb.confOnce you know the basics, you can move on to do more advanced Samba configurations.