How to Block IP Address in UFW Firewall on Ubuntu
In the last tutorial, we learned how to open ports using the UFW firewall. In this tutorial, you'll learn how to block IP addresses with UFW, how to apply the block to specific ports, and — most importantly — why the position of firewall rules determines whether your block will actually work.
Basic Command to Block an IP
The command to block an IP address in UFW is:
ufw deny from <IP-address>Optionally, you can restrict the rule to a specific port by typing:
ufw deny from <IP-address> to any port <port-number>This will block access from the IP address only to the specified port.
By default, new rules are added at the end of the list, which may affect their effectiveness. To place a rule at a specific position, use the ufw insert command. For example:
ufw insert 1 deny from <IP-address>This inserts the deny rule at the top of the firewall rules, ensuring it’s processed first.
The Most Important Thing: Rule Position
The most important thing when blocking an IP address is the position of the rule in the firewall table.
Let’s look at an example:
- Suppose we have a rule that denies access to port 80 from a specific IP address.
- But before that deny rule, there's another rule that allows all traffic to port 80.
In this case, the deny rule won’t work. Why?
Because when a request comes from that IP address to port 80, UFW processes the rules in order. It sees the allow rule first and lets the connection through—so the deny rule is never applied.
To fix this, the deny rule must be inserted before any rule that allows traffic to the same port.
Demonstration: Blocking a Client IP Address
Let’s walk through an example setup.
Step 1: Check Current Firewall Status
You can run the ufw status numbered command to check the firewall status, with rule numbers assigned to each rule.
ufw status numbered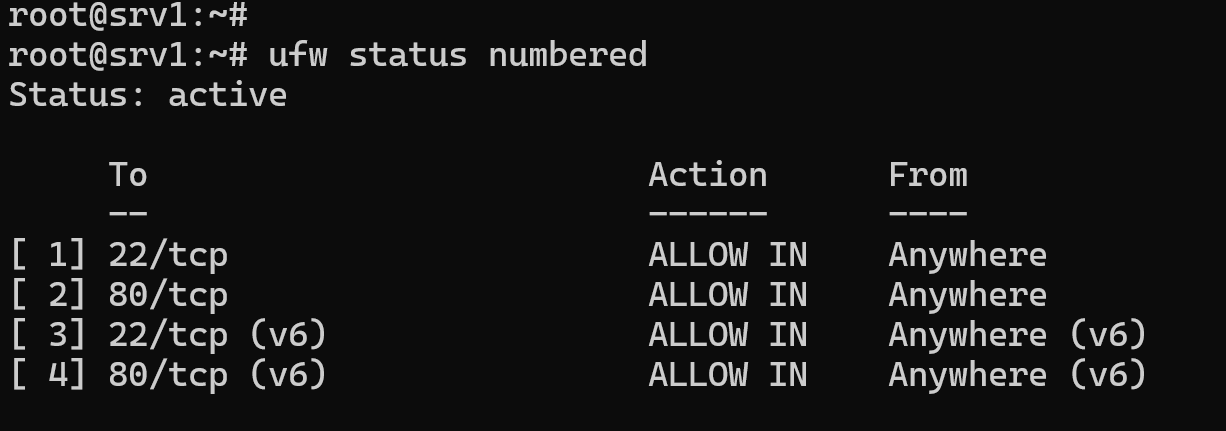
Step 2: Add a Deny Rule
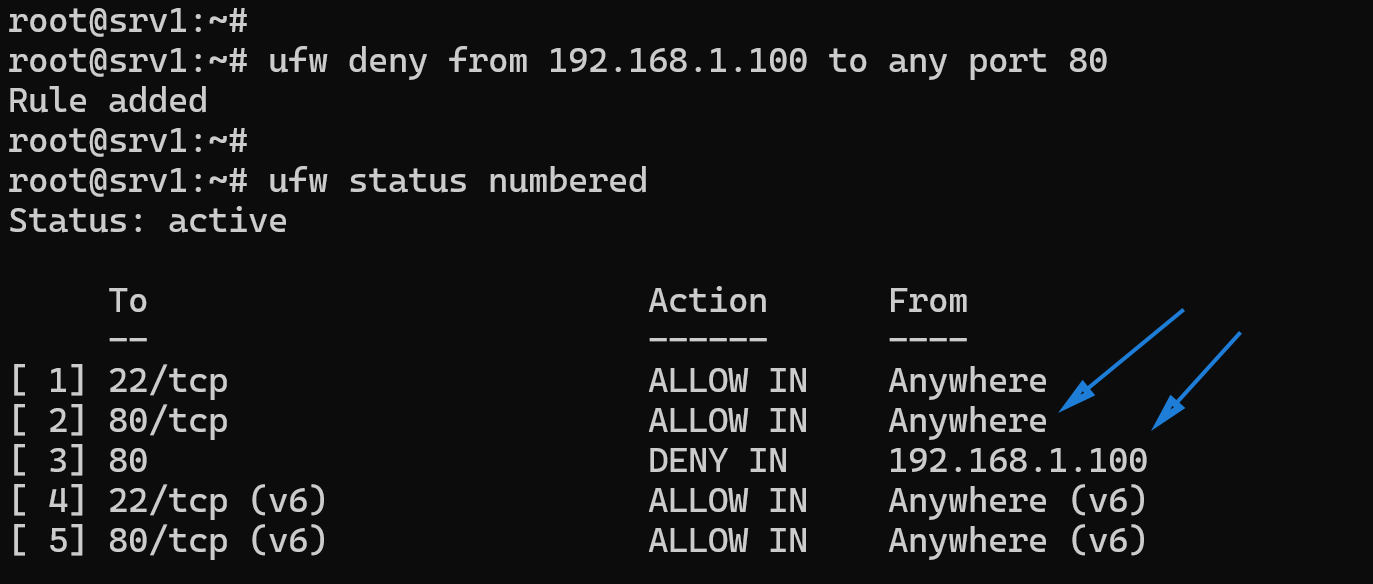
Now, let’s block the client with IP address 192.168.1.100 from accessing port 80 using the ufw deny command.
ufw deny from 192.168.1.100 to any port 80After running this command, if we check the firewall table, we’ll see that the new deny rule was added after the existing allow-anywhere rule.
Step 3: Understand Why It Doesn’t Work Yet
Here’s the problem:
- There is already an allow rule for port 80 at position 2.
- UFW will match that allow rule first, so the deny rule will not take effect.
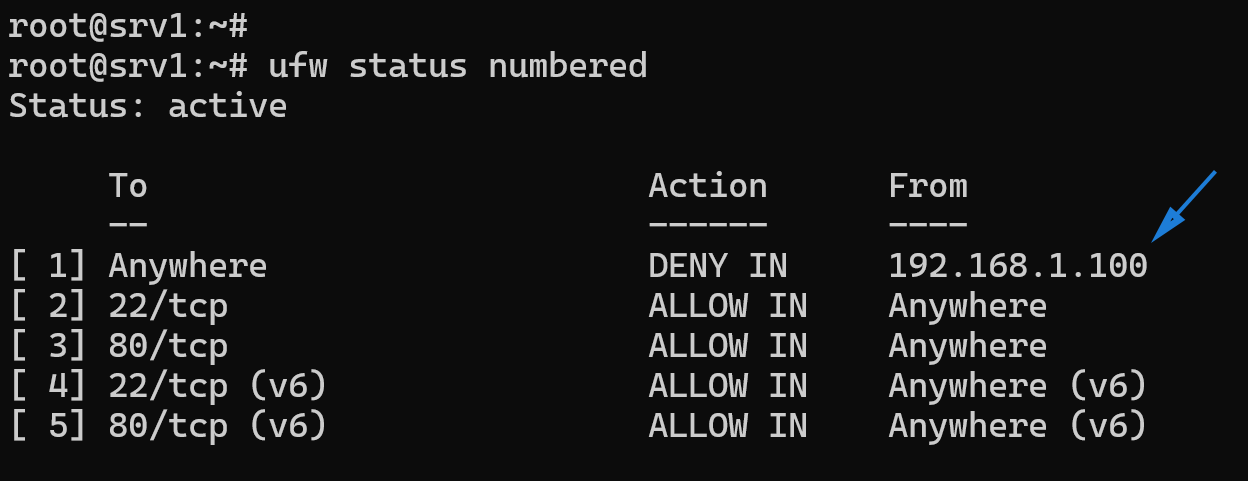
Fixing It: Inserting the Deny Rule Correctly
To make the deny rule work, we need to:
- Delete the deny rule at position 3 (because it’s ineffective).
- Insert a new deny rule before the allow rule.
Step 4: Delete the Old Rule
To delete the existing rule at position 3, run:
ufw delete 3Step 5: Insert the Deny Rule at the Top
Now, insert a new blocking rule at position 1 using the following command:
ufw insert 1 deny from 192.168.1.100If we now check the firewall table, the deny rule is at the top of the list, and the client should no longer be able to access the web server.
Conclusion
And that’s how we block IP addresses in the UFW firewall on Ubuntu.
The key takeaway is: Make sure deny rules appear before allow rules—otherwise, the deny rule won’t have any effect.