How To Disable Lock Screen Windows 10
To disable the lock screen on Windows 10, sign in to your computer with a user that has administrator rights and complete the following steps:
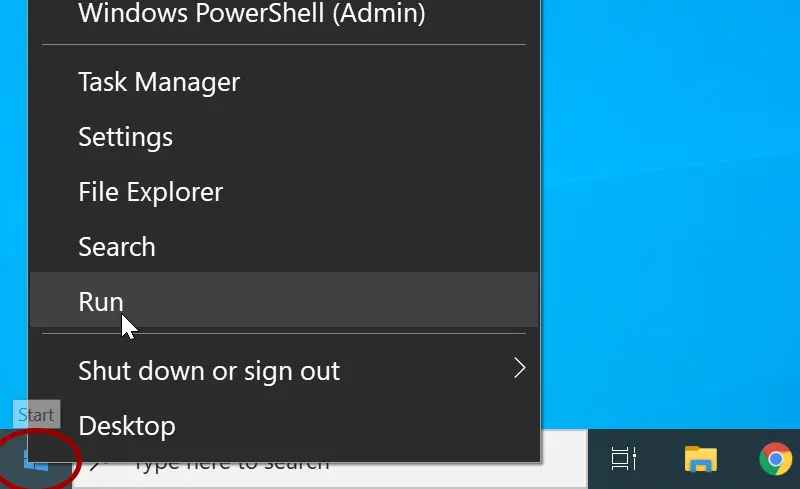
Right-click the Start button, and select Run (or press Windows Logo+R key).
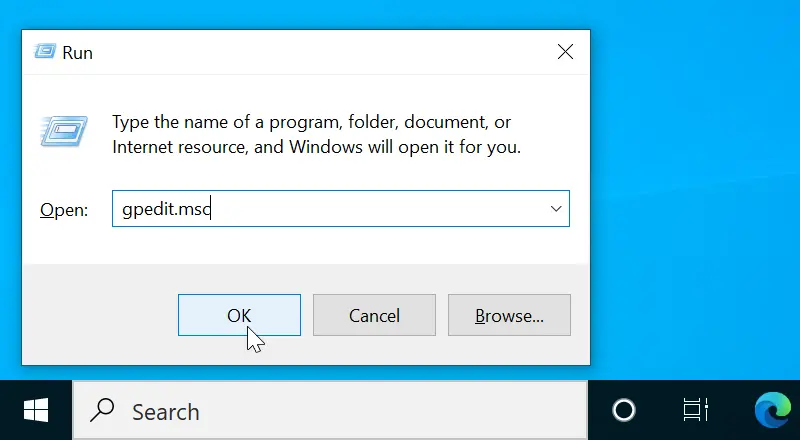
In the Run dialog box, type gpedit.msc and press Enter.
This opens the Local Group Policy Editor.
In the Local Group Policy Editor, navigate to Computer Configuration | Administrative Templates | Control Panel | Personalization.
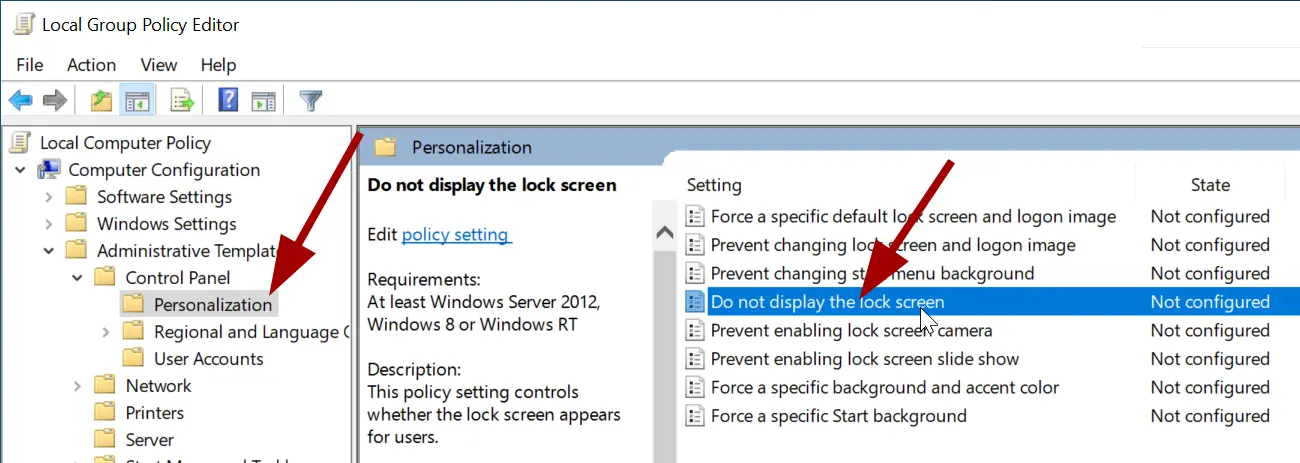
In the main window, double click the Do not display the lock screen policy.
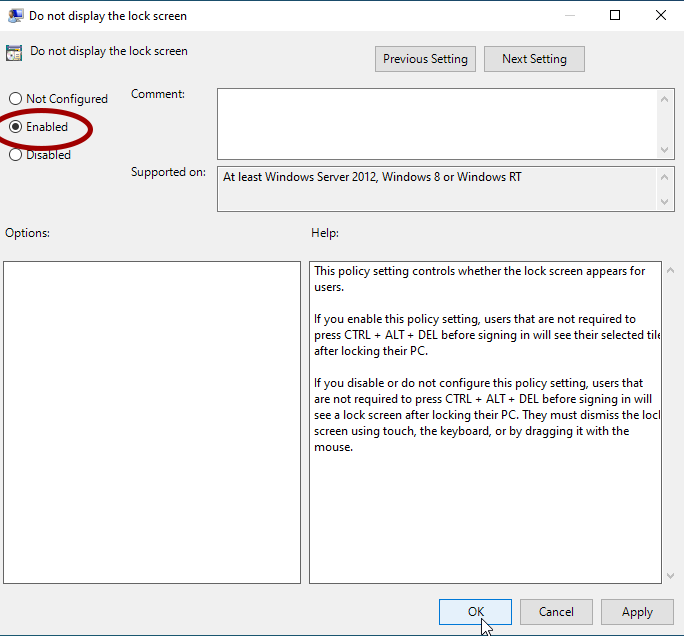
Change the setting to Enabled and then Click Ok. The lock screen will be disabled.
Note that the Local Group Policy Editor is not available for Windows the 10 Home edition. If your computer is running Windows 10 Home, you have to edit the registry.
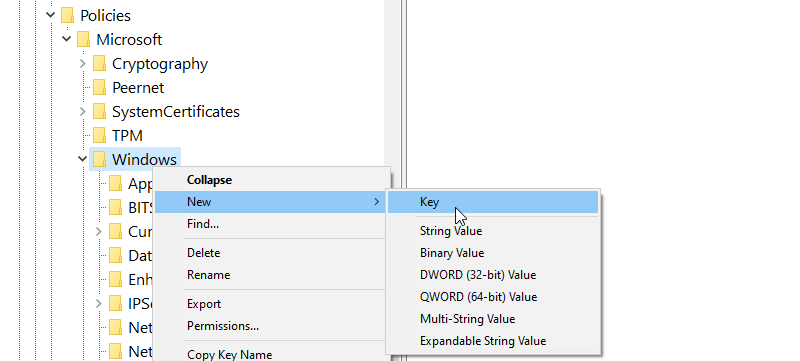
Open the Registry Editor (type Regedit in the run dialog box) and navigate to HKEY_LOCAL_MACHINE | Software | Policies | Microsoft | Windows | Personalization.
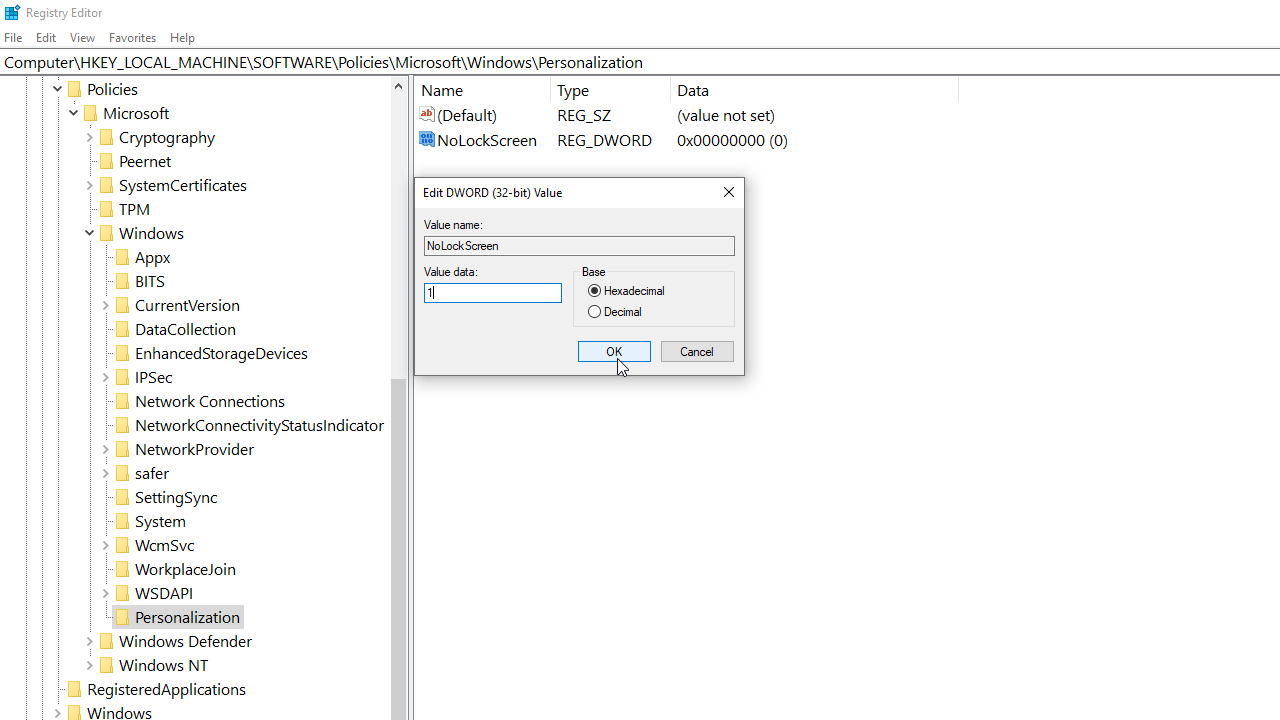
Double-click the NoLockScreen, set its value to 1, and then click OK. Exit the Registry Editor and restart Windows 10.
If you do not see a key named Personalization, right-click Windows, go to New > Key, type Personalization, and then press Enter.
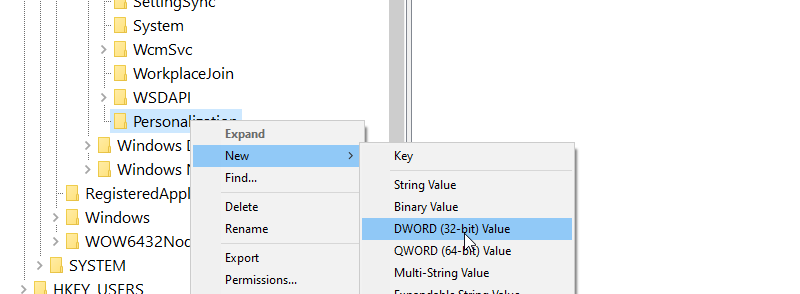
Then, right-click the Personalization key, go to New > DWORD (32-bit) Value, type NoLockScreen, and then press Enter.
What happens when you disable the lock screen?
With the lock screen is disabled, when you start your computer, Windows 10 takes you directly to the log-in screen.
This eliminates that extra step of dismissing the lock screen before you can sign on.