How to Enable Administrator Account in Windows 10
Microsoft Windows 10 has a built-in Administrator account, a superuser that has ultimate privileges to the operating system. Similar to Linux root user.
However, you can't log in to this account because it disabled by default in Windows 10. You can, however, activate this account with the following steps:
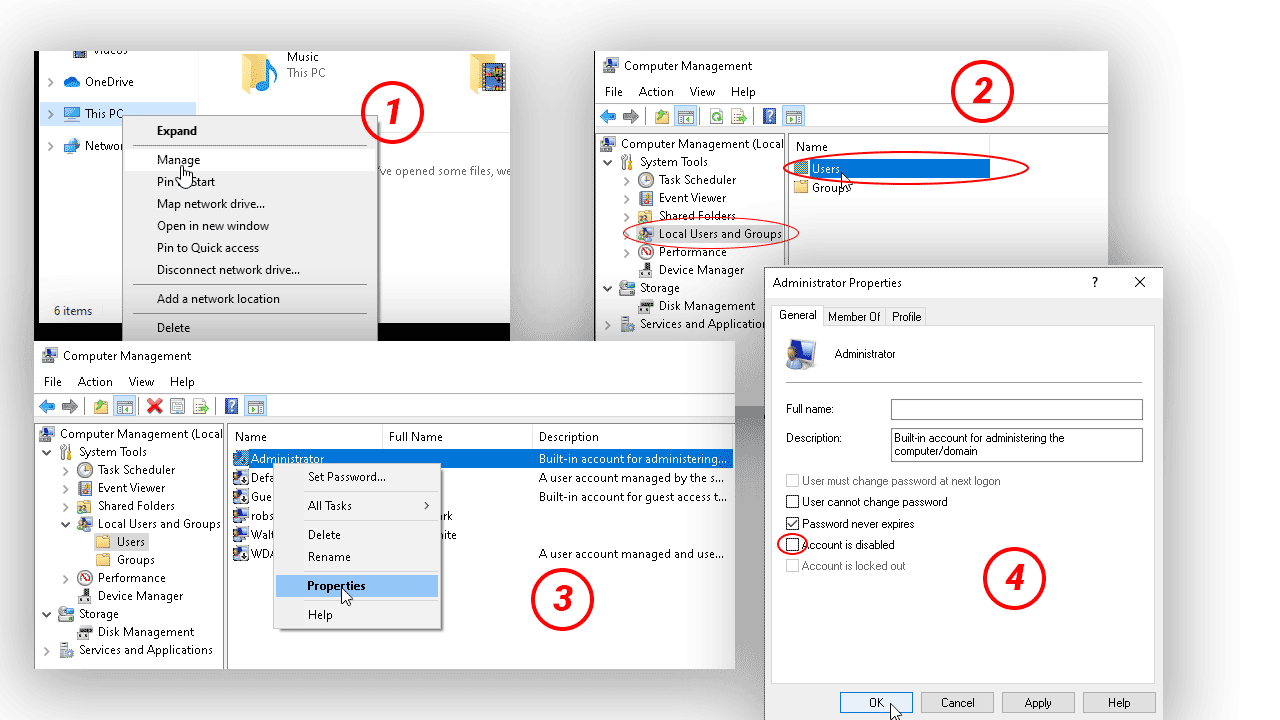
- Open Windows explorer and right click on This PC. From the menu, select Manage.
- In the left column, double click on the Local User and Groups and open the Users folder. You should see the built-in Administrator account in the list.
- Right click on the Administrator account and choose Properties.
- Uncheck the Account is disabled checkbox and then click OK.
Now you have successfully activated the Windows Administrator account, but we didn't create a password and therefore anyone can now login to Administrator account without having to type the password. But you don't want to allow someone to login to this Account without credentials.
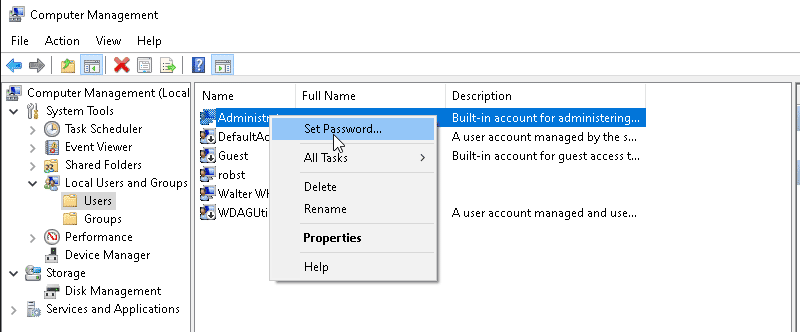
To create new password, right click on the Administrator user and select Set Password.
The password has been set, Press Windows + l key to activate the lock screen and you will see Administrator user listed in the bottom left corner (You may have to restart your PC).
Windows 10 Administrator account is a special account that has full control over the operating system and this account is disabled by default in Windows 10.