Enable Ping in Windows Firewall (Quick & Easy Guide)
If you want to allow ping in Windows Firewall on Windows 10, Windows 11, or Windows Server, this guide will show you how. I will cover two methods: using PowerShell and using the GUI.
Allow Ping Using PowerShell
To enable ping using PowerShell, you need to run two commands:
For IPv4:
Enable-NetFirewallRule -DisplayName "File and Printer Sharing (Echo Request - ICMPv4-In)"For IPv6:
Enable-NetFirewallRule -DisplayName "File and Printer Sharing (Echo Request - ICMPv6-In)"Important:
- Open PowerShell as Administrator before running these commands.
- Run the commands in PowerShell, not Command Prompt.
Once executed, you should be able to ping your system using the ping command.
To disable the firewall rules for ping using PowerShell, you can use the Disable-NetFirewallRule command:
Disable-NetFirewallRule -DisplayName "File and Printer Sharing (Echo Request - ICMPv4-In)"
Disable-NetFirewallRule -DisplayName "File and Printer Sharing (Echo Request - ICMPv6-In)"
Allow Ping Using GUI
If you prefer using the GUI:
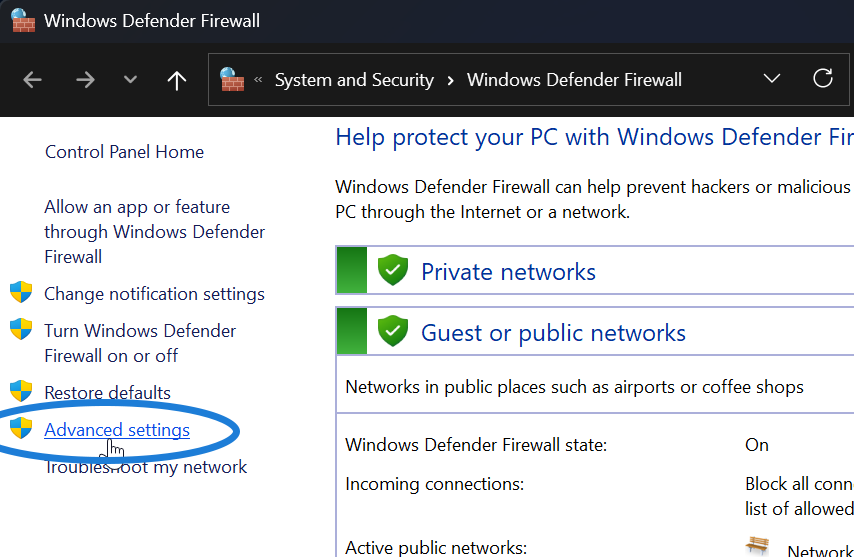
- Open Windows Defender Firewall and go to Advanced Settings.
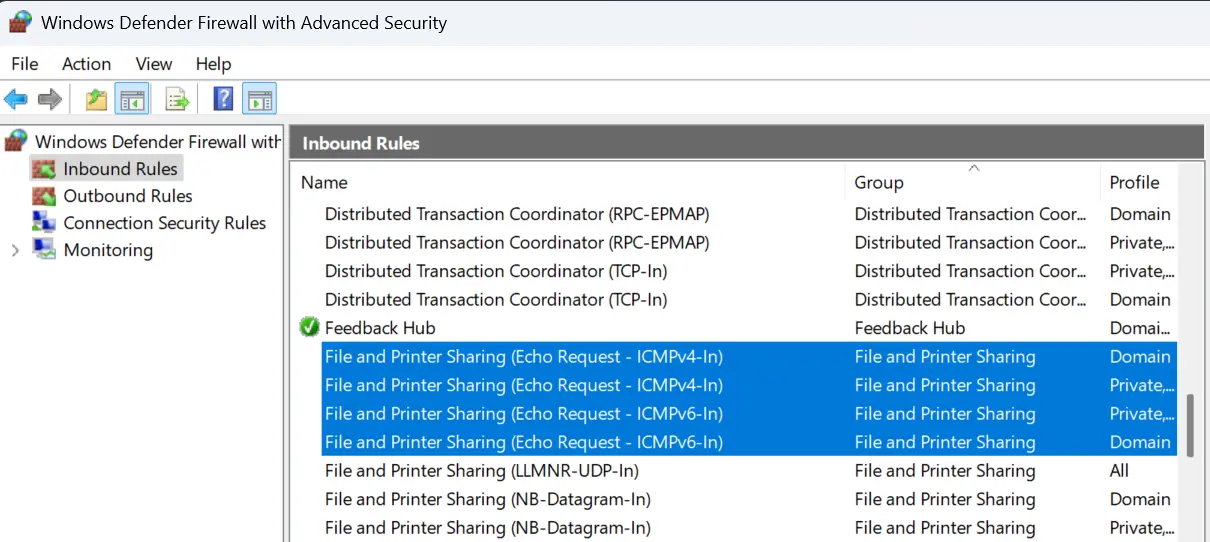
- Select Inbound Rules and locate File and Printer Sharing (Echo Request) rules.
- You will see four rules for each protocol (IPv4 and IPv6) because of the different firewall profiles: "Domain" and "Private, Public".
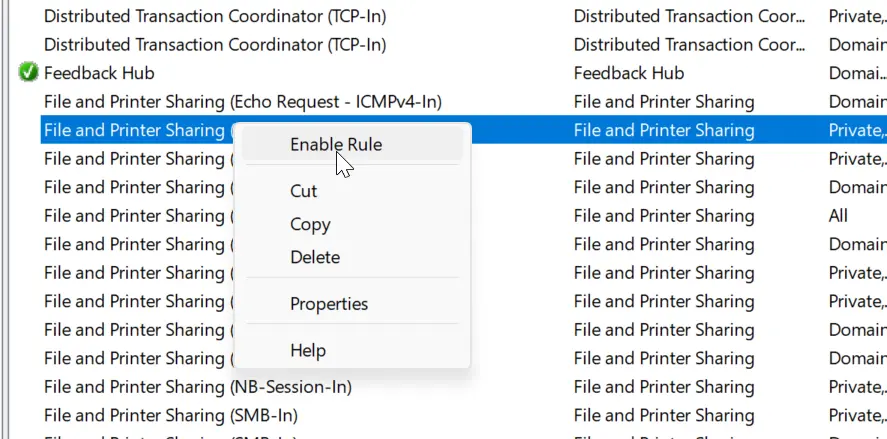
- Right-click each rule and select "Enable Rule".
For a standalone computer, enabling the "Private, Public" profiles is usually enough. If you’re unsure, enable all profiles.
Important Notes
- These are predefined firewall rules and should exist unless manually deleted.
- If they were deleted, you can restore Windows Firewall to defaults to get them back.
And that’s how you enable ping in Windows Firewall using both PowerShell and the GUI.