How to Find the IP Address in Windows 10/11 Using the Command Prompt
In this tutorial, we will learn how to find your IP address in Windows 10 using the Command Prompt.
There are a couple of CMD Commands to check IP addresses in Windows 10/11. One is ipconfig. Another one is netsh.
To open a command prompt, right-click the start button and choose PowerShell (Admin) or Windows Terminal (Admin) if you are on Windows 11.
Using Ipconfig Command
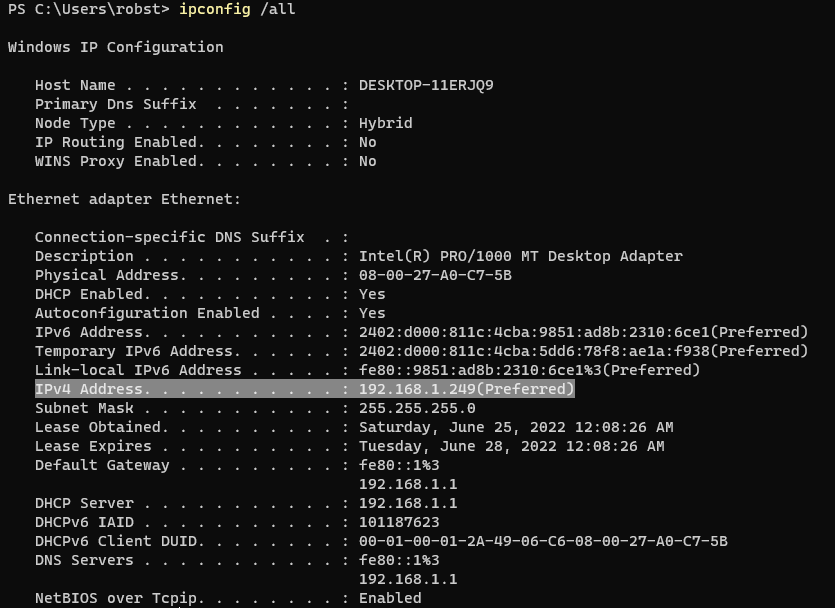
In the command prompt, type ipconfig /all and press Enter:
ipconfig /allThe ipconfig command displays the current IP configuration for all of your computer's network interfaces.
You should see an output similar to the following:
Using Netsh command
We can also use the netsh command to find IP Address(es) in Windows 10. First, run the following command to list all available network interfaces on your computer.
netsh interface show interfaceTo show the IP configuration, run the following command:
netsh interface ipv4 show addressesTo show IPv6 configuration, run the following command:
netsh interface ipv6 show addressesTo be more specific, you can specify the interface name. For example, to find the IP address of an interface named Ethernet, you will run the netsh command as follows:
netsh interface ipv4 show addresses name="Ethernet"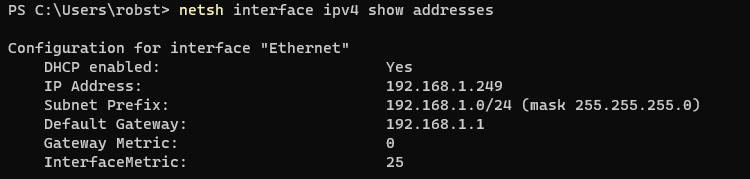
And that is how you find IP Addresses using CMD. It will work on any Windows operating system.