Install Kali Linux on Windows 10 Subsystem for Linux
Kali Linux is the Linux distribution popular with people (penetration testers, IT professionals, security consultants) who do security testing.
In this tutorial, we will learn how to install Kali on the Windows Subsystem for Linux. This is a two-step process, the first step is to enable the WSL feature. The second step is to install the Kali Linux Windows app from the Microsoft store.
Our first step is to enable the Windows subsystem for Linux. To do that execute the following command from the Windows PowerShell as an Administrator:
Enable-WindowsOptionalFeature -Online -FeatureName Microsoft-Windows-Subsystem-LinuxAfter enabling the WSL, you need to restart your PC.
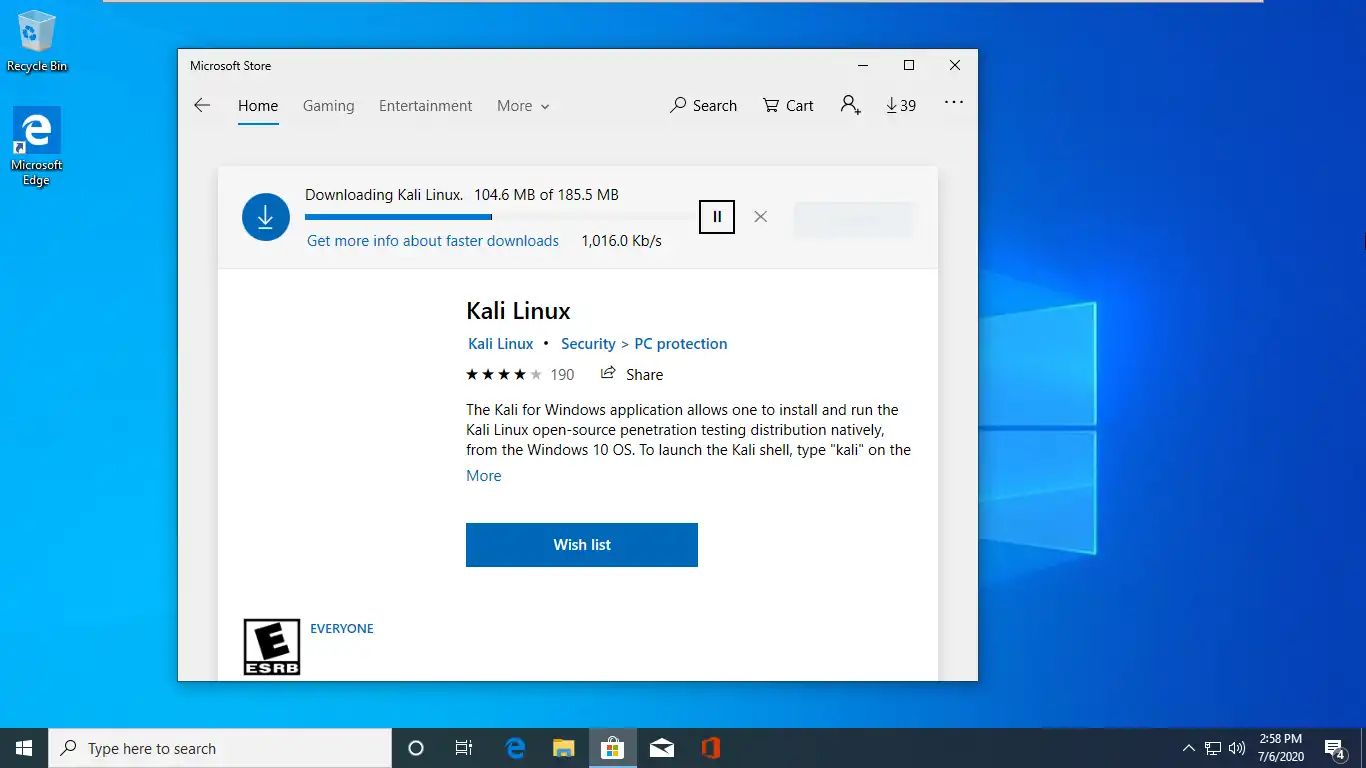
Next, we will install Kali Linux from the Microsoft store. Go to the Microsoft Store, search for Kali Linux.

Select the Kali Linux app from the result and install it.
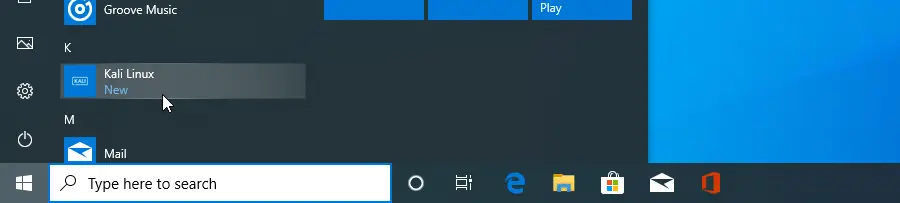
Once the installation is done, click on Launch (or use the Windows 10 start menu shortcut).
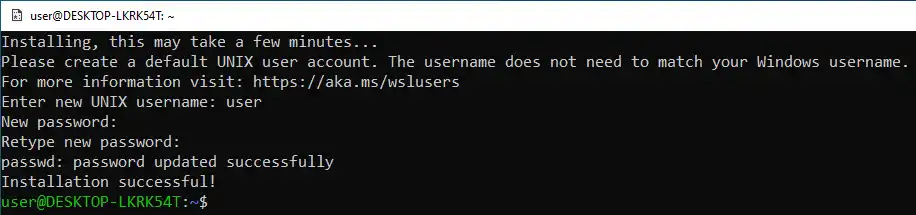
Windows will open up the console window, which will ask you to create a user account for the Kali Linux operating system.
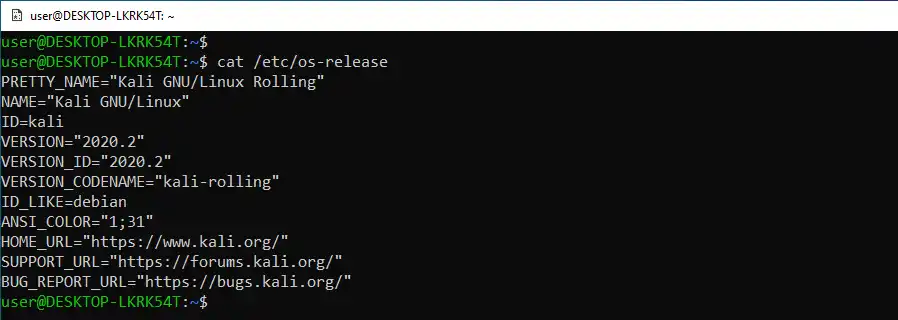
And that is how we install Kali Linux on Windows 10 with two easy steps. you can run the following command to show the specific version of Kali Linux that was installed on Windows Subsystem.
Kali Linux (Kali) is a penetration testing platform that includes over 500 advanced penetration testing, data forensics, and defensive tools. The windows app allows us to run Kali Linux as a windows subsystem and give access to the Kali shell for security testing.