How to Change User Account Name in Windows 10
Windows 10 includes two types of user accounts: Microsoft Account and Local Accounts.
We can change the name of a Microsoft Account from the Windows Settings. Local accounts have to edit from the Control Panel.
Change User Account Name of Microsoft Account
Perform the following steps to change the account name of your own Microsoft Account:
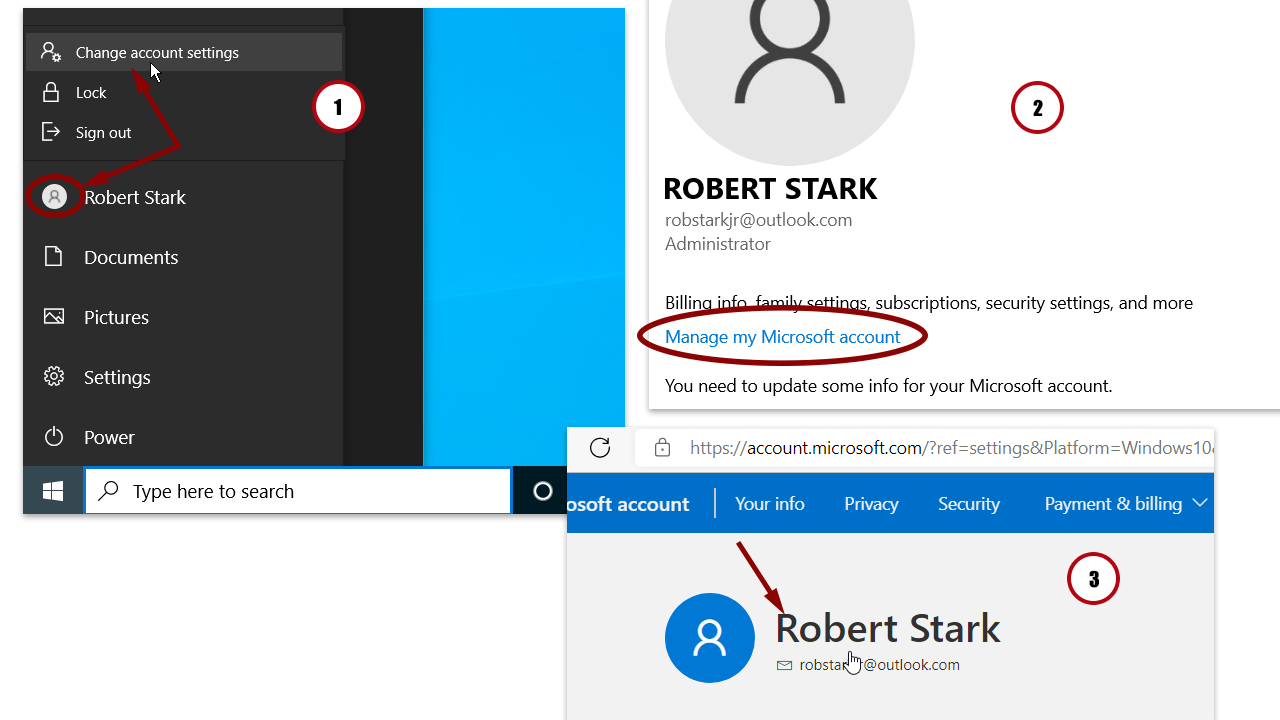
- Open the Start menu, click the user icon (your profile picture) and choose Change account settings.
- Under the Your Info section, click on Manage my Microsoft account. This will open your default web browser and load your account page.
- Then, click on your name to edit the profile.
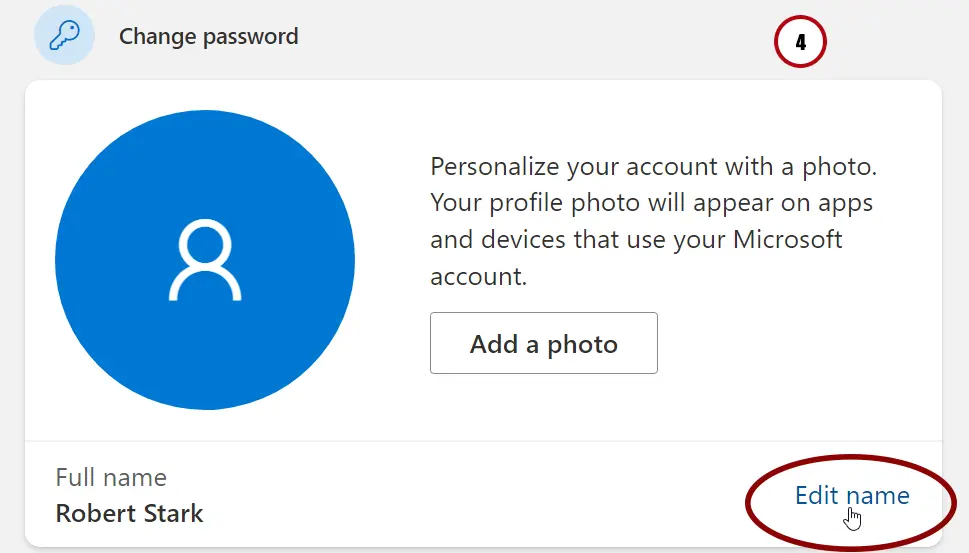
- Click on the Edit name link.
- A pop-up window appears, in which you can change your First name and Last name.
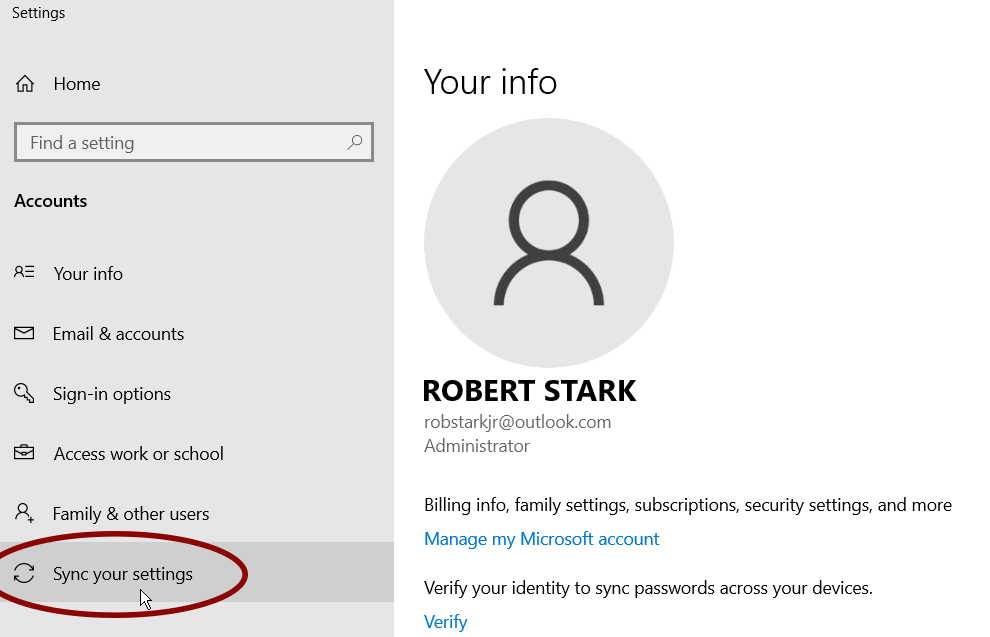
Change may not be reflected immediately in Windows settings. You can click on Sync your settings in the left pane to sync account details with your Windows 10 PC.
Change Name of a Local Account
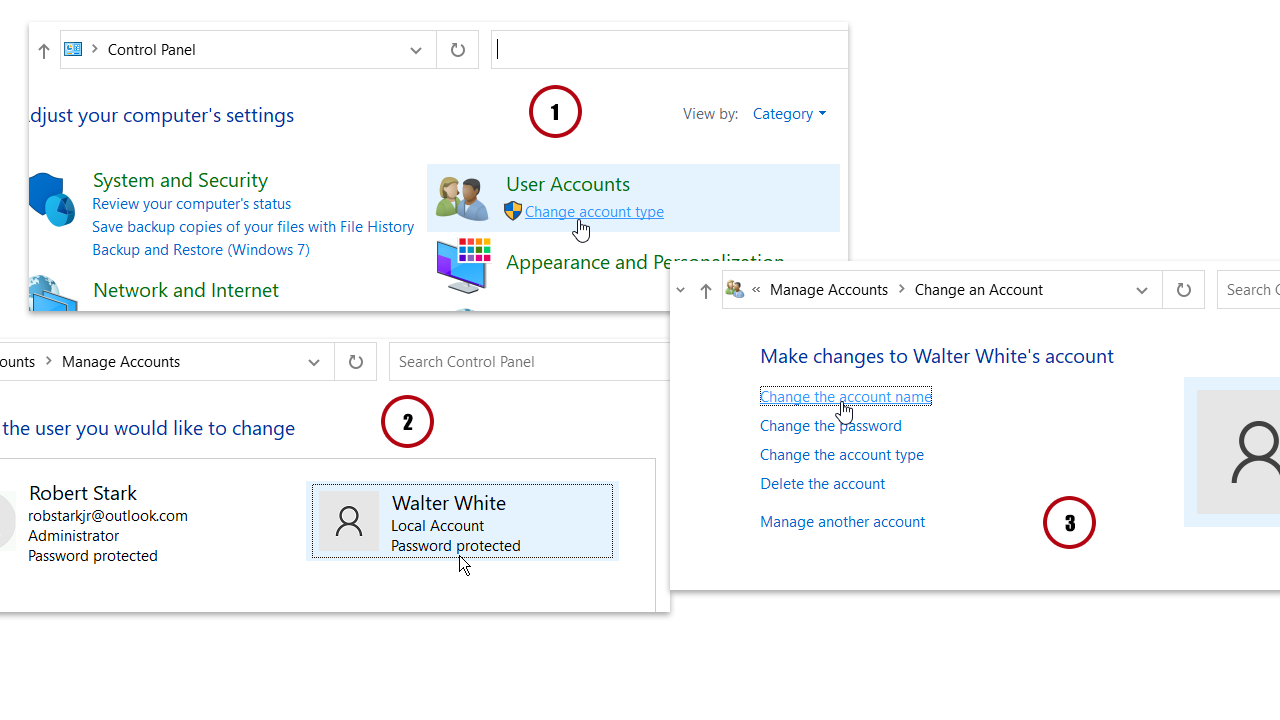
- Open Windows 10 Control Panel and click Change account type.
- Select the Local user you want to change.
- Click on Change the account name.
Note that the name you’re changing here is the full name of the local user, which is the one that appears on the welcome screen and Start menu, not the actual login name.
If you want to rename the login name, read the following guide on How to change the user name of a local user account on Windows 10.